12/11/25About 1 min
Installing Kali WSL on Windows 10
Kali comes with many security testing tools. If you don't want to take up C drive space, you can migrate the WSL distribution to the E drive. This article documents the process of installing Kali WSL, exporting a backup, reimporting to a specified directory, and setting the default login user.
Prerequisites
Windows system needs WSL enabled first.
If you previously installed Kali WSL, you can uninstall the old instance with the following command:
wsl --unregister kali-linuxProcedure
- Install Kali, set a user password as prompted, and enter the system.
wsl --install -d kali-linux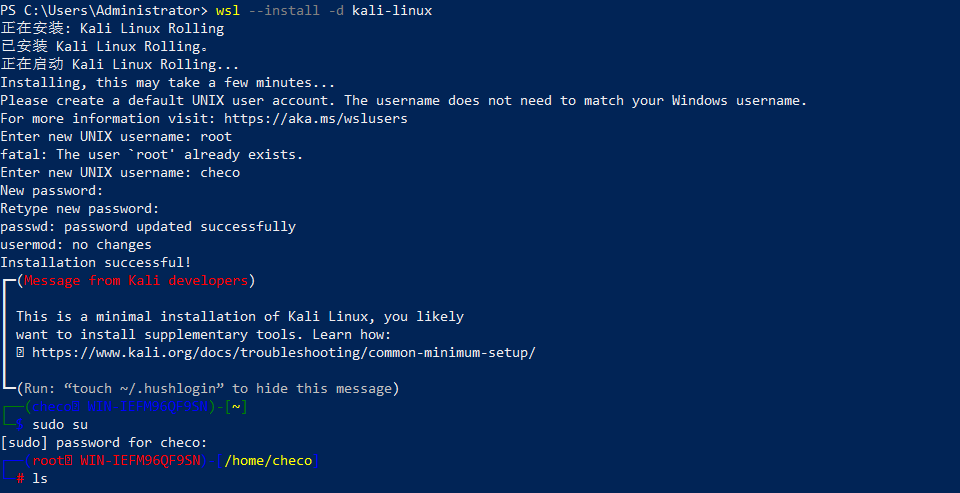
- Package the current Kali system and save it to an intermediate location.
wsl --export kali-linux D:\kali-backup.tar
- Delete the current Kali system.
wsl --unregister kali-linux
- Import a new Kali system on the E drive using the package exported in step 2.
wsl --import kali-linux E:\WSL\Kali D:\kali-backup.tar
- Log in to the Kali system.
wsl -d kali-linuxAt this point you'll be logged in as root by default.

- Create a configuration file to specify that WSL should log in with the
checouser by default.
echo -e "[user]\ndefault=checo" > /etc/wsl.conf
- Exit and restart WSL.
wsl --terminate kali-linuxwsl -d kali-linux
After re-entering, the prompt changes to $ and the username becomes checo.
Summary
This way you can put Kali WSL on a non-system drive, reducing C drive usage. If I continue writing later, I can add another article on Kali common tools and WSL network configuration.