
Shrinking EC2 Windows EBS Root and Data Volumes Safely
Amazon EBS supports increasing a volume size, but it does not support shrinking one directly. For a data volume, create a smaller volume and copy the files to it. A Windows root volume, or a data volume containing continuously written files such as SQL Server databases, should be handled offline after stopping the instance.
This example uses Windows Server 2012 R2. The original root and data volumes are both 100 GB gp3 volumes, and the target size is 50 GB each.
Create an AMI before starting, test the procedure in a non-production environment, and schedule the root-volume migration during a maintenance window. Stopping an instance can lose instance-store data and an automatically assigned public IP address (an Elastic IP is not affected).
AWS documentation: EBS volume modification limitations
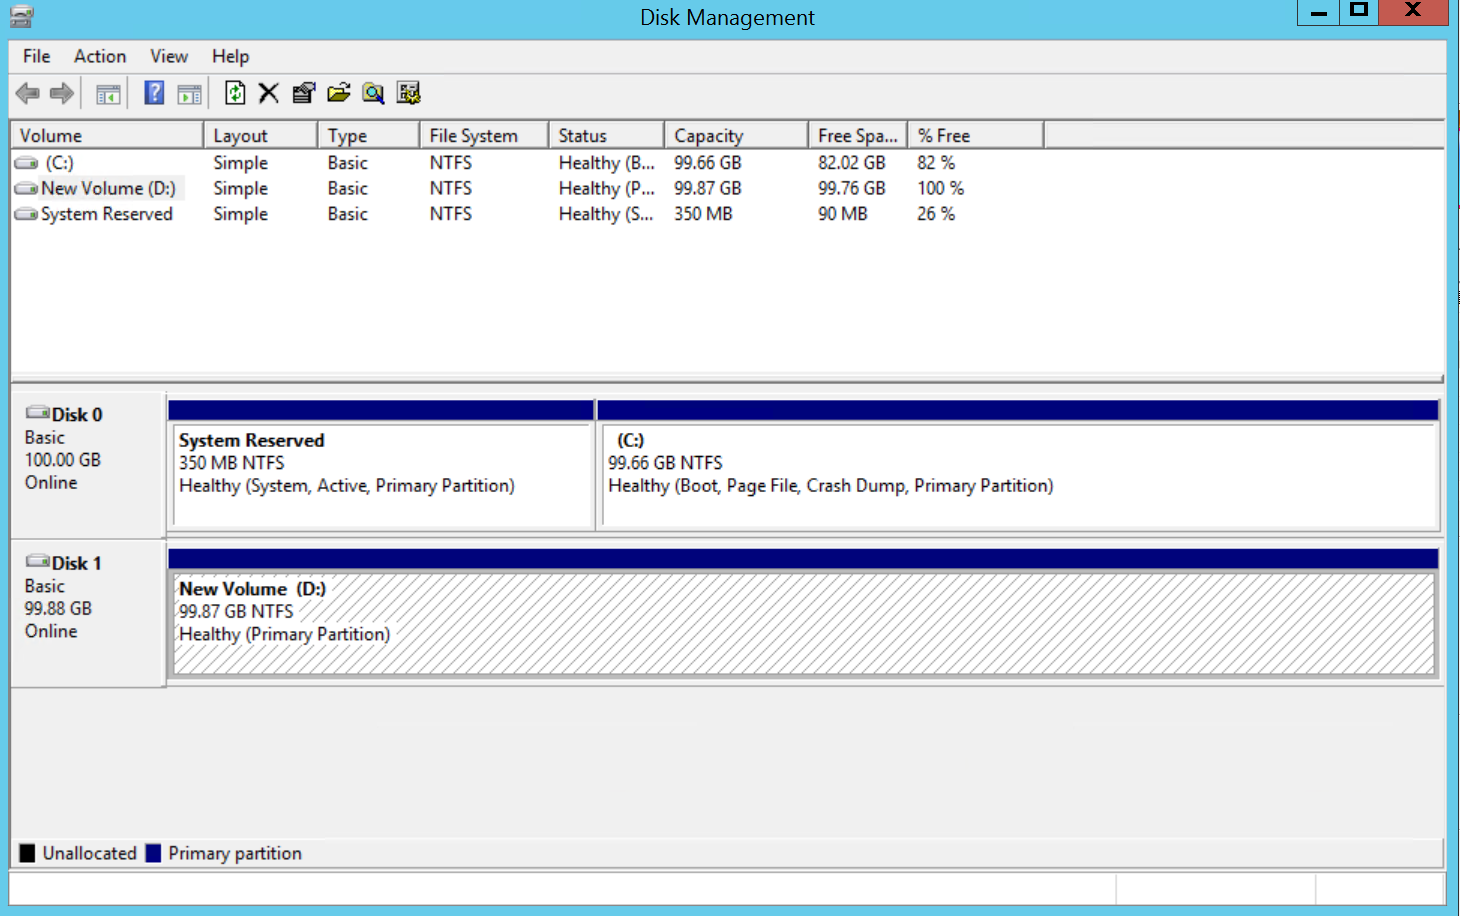
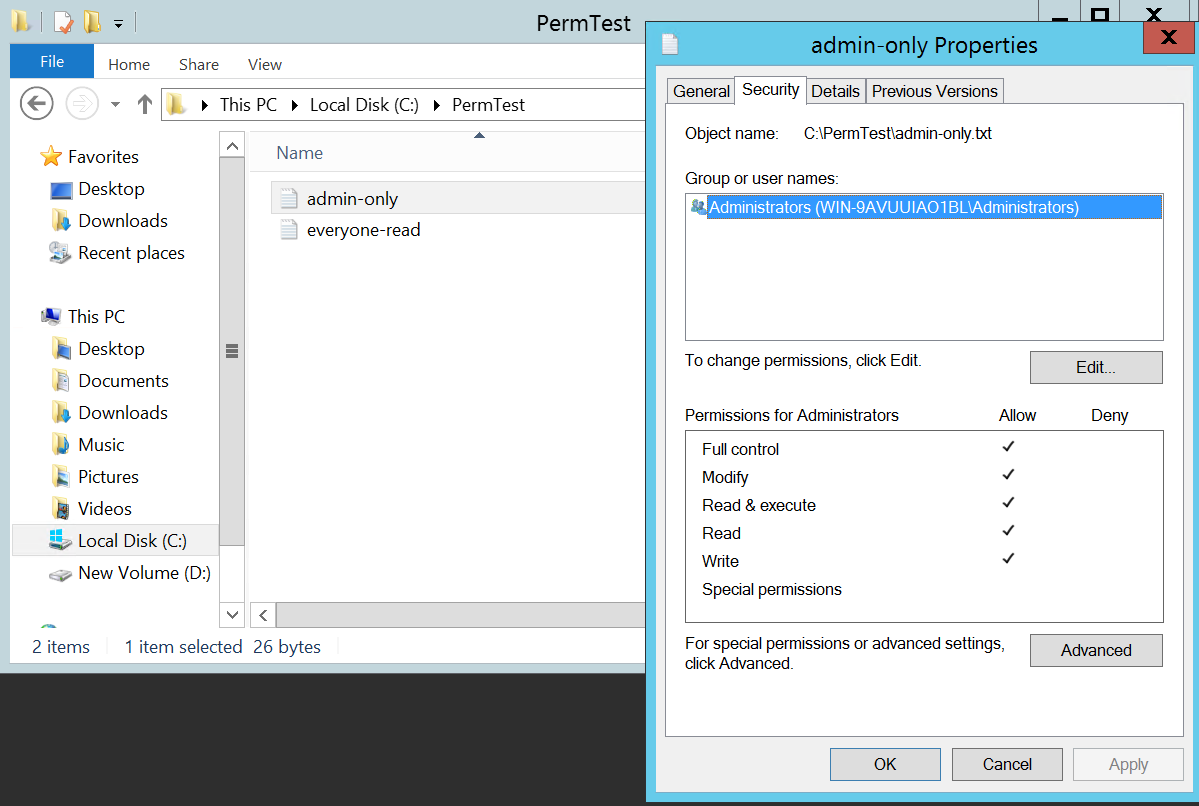
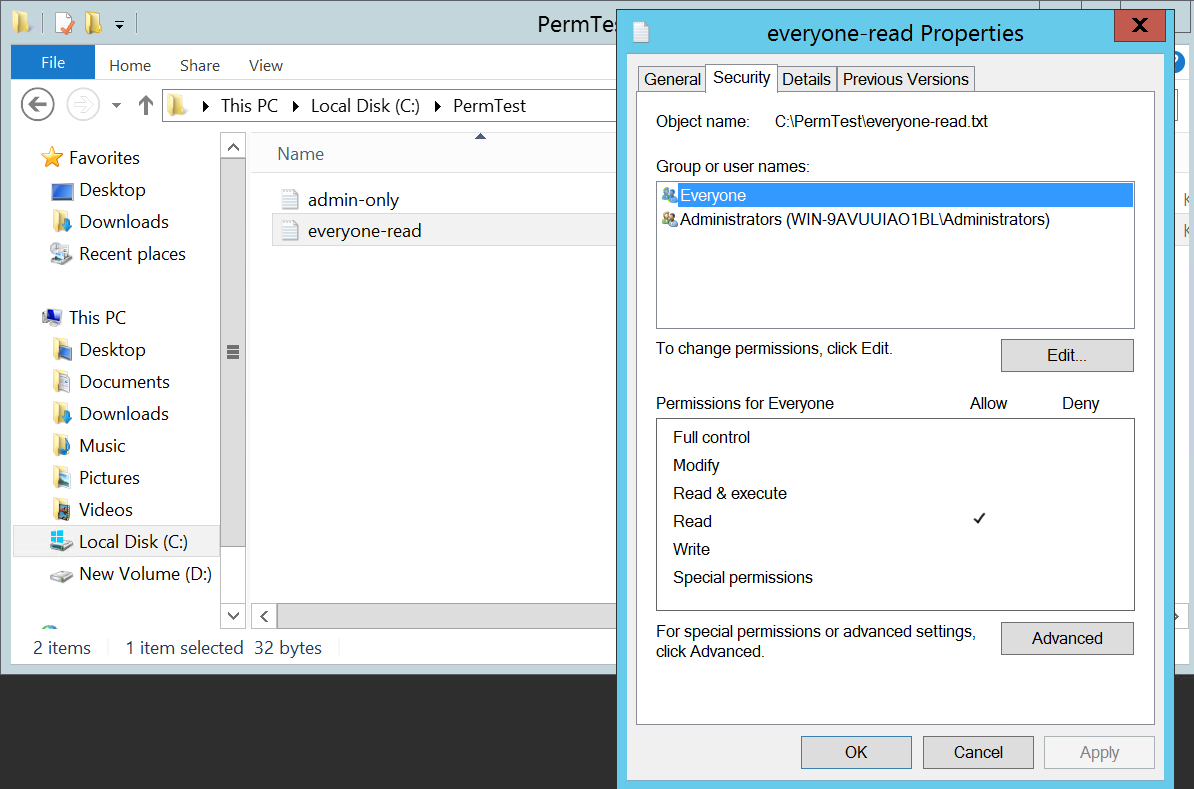
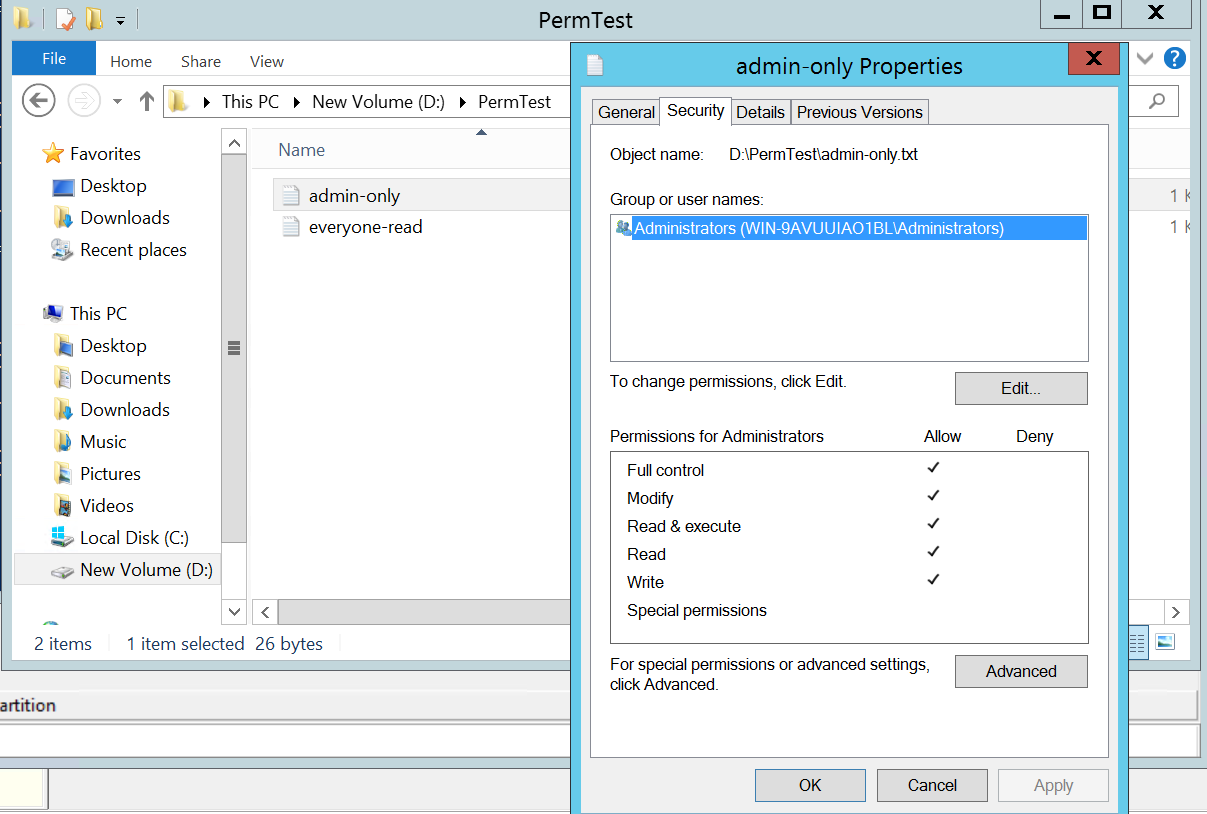
1. Migrate the data volume (D: to a new 50 GB volume)
The data volume can be copied online, without downtime.
1. Create and attach the new EBS volume
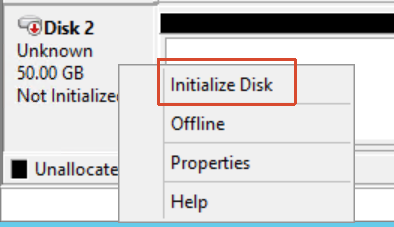
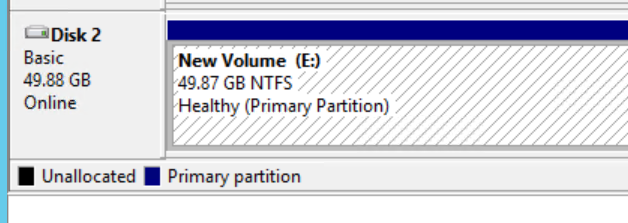
Create a 50 GB EBS volume in the same Availability Zone as the instance and attach it. In Windows Disk Management, bring it online, initialize it with the same partition style as the source (MBR or GPT), create a simple NTFS volume, and assign drive letter E:.
2. Copy the data with robocopy
robocopy D:\ E:\ /MIR /COPYALL /R:1 /W:1 /LOG:C:\robocopy-d.log/MIR: mirror the directory tree./COPYALL: equivalent to/COPY:DATSOU; copies data, attributes, timestamps, NTFS security, owner, and auditing information./R:1 /W:1: retry once and wait one second./LOG: write a log for review.
3. Verify the data volume
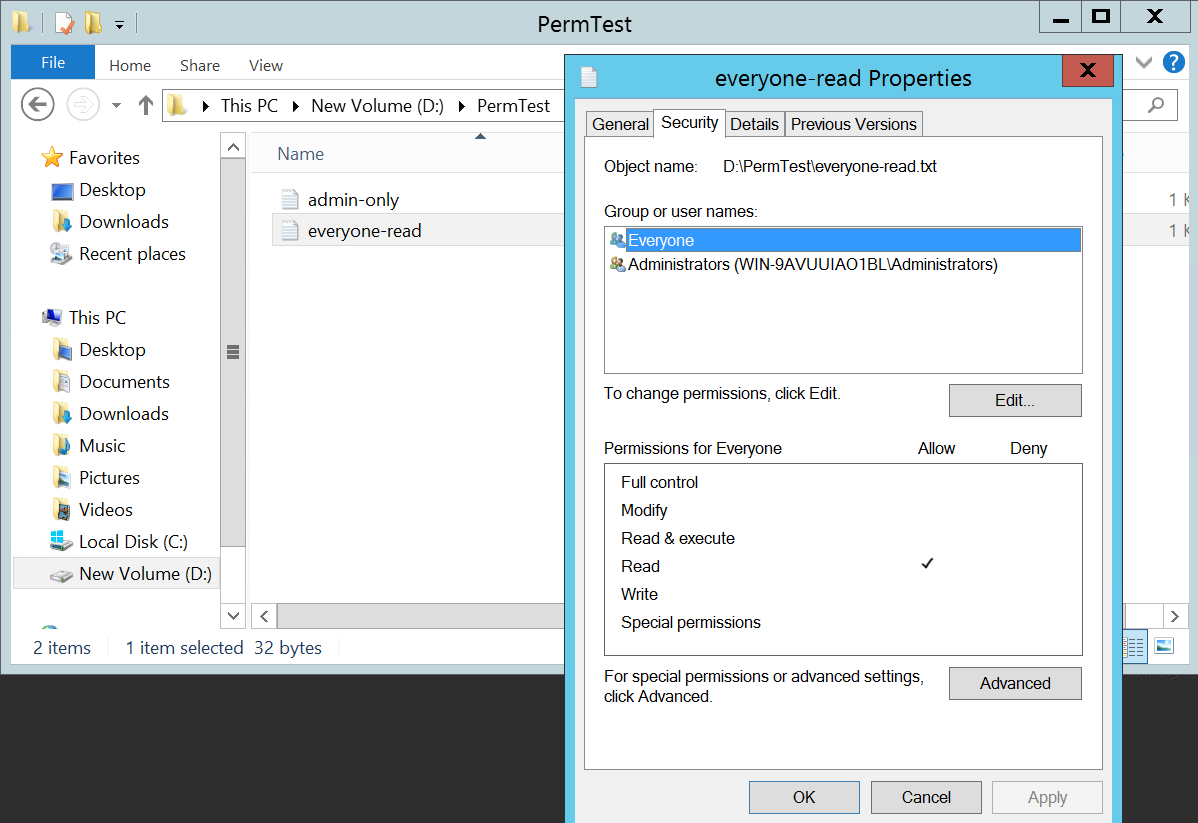
Check the log, permissions, and sample files:
type C:\robocopy-d.log | findstr /i "FAILED"
icacls E:\PermTest\*
dir E:\PermTest
type E:\PermTest\admin-only.txt
Confirm that the copy completed without failed files and that representative NTFS permissions match the source volume.
4. Swap the drive letter online
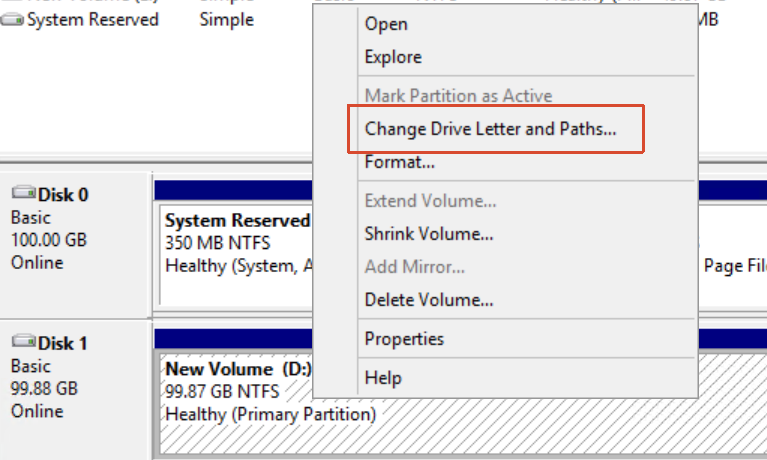
In Disk Management, change the original D: volume to a temporary letter such as X:, then change the new E: volume to D:. Verify that applications can access D: normally.
Get-WmiObject Win32_LogicalDisk -Filter "DeviceID='D:'" | Select Size, FreeSpaceKeep the original volume offline until validation is complete. Then detach it from EC2 and delete it only after confirming that the new volume is healthy.
2. Migrate the system volume (C: to a new 50 GB volume)
System files are locked while Windows is running, so the root volume must be cloned offline from a helper instance.
1. Record the original instance information
Record the original instance Availability Zone, instance ID, root volume ID, root device name, and partition style before making changes.
2. Prepare the helper instance
Launch a Windows Server helper instance in the same Availability Zone and install DiskGenius (the free edition is sufficient): DiskGenius download.
3. Stop the original instance and detach the root volume
Stop the original instance, wait for the Stopped state, and detach its root volume.
4. Create a new 50 GB volume
Create a new 50 GB gp3 volume in the same Availability Zone as the helper and original instances.
5. Attach the original and new volumes to the helper
Attach both the original 100 GB root volume and the empty 50 GB volume to the helper instance. In Disk Management, bring the original volume online but cancel the initialization wizard for the new volume. Do not format or partition the target; DiskGenius will write the cloned disk layout.
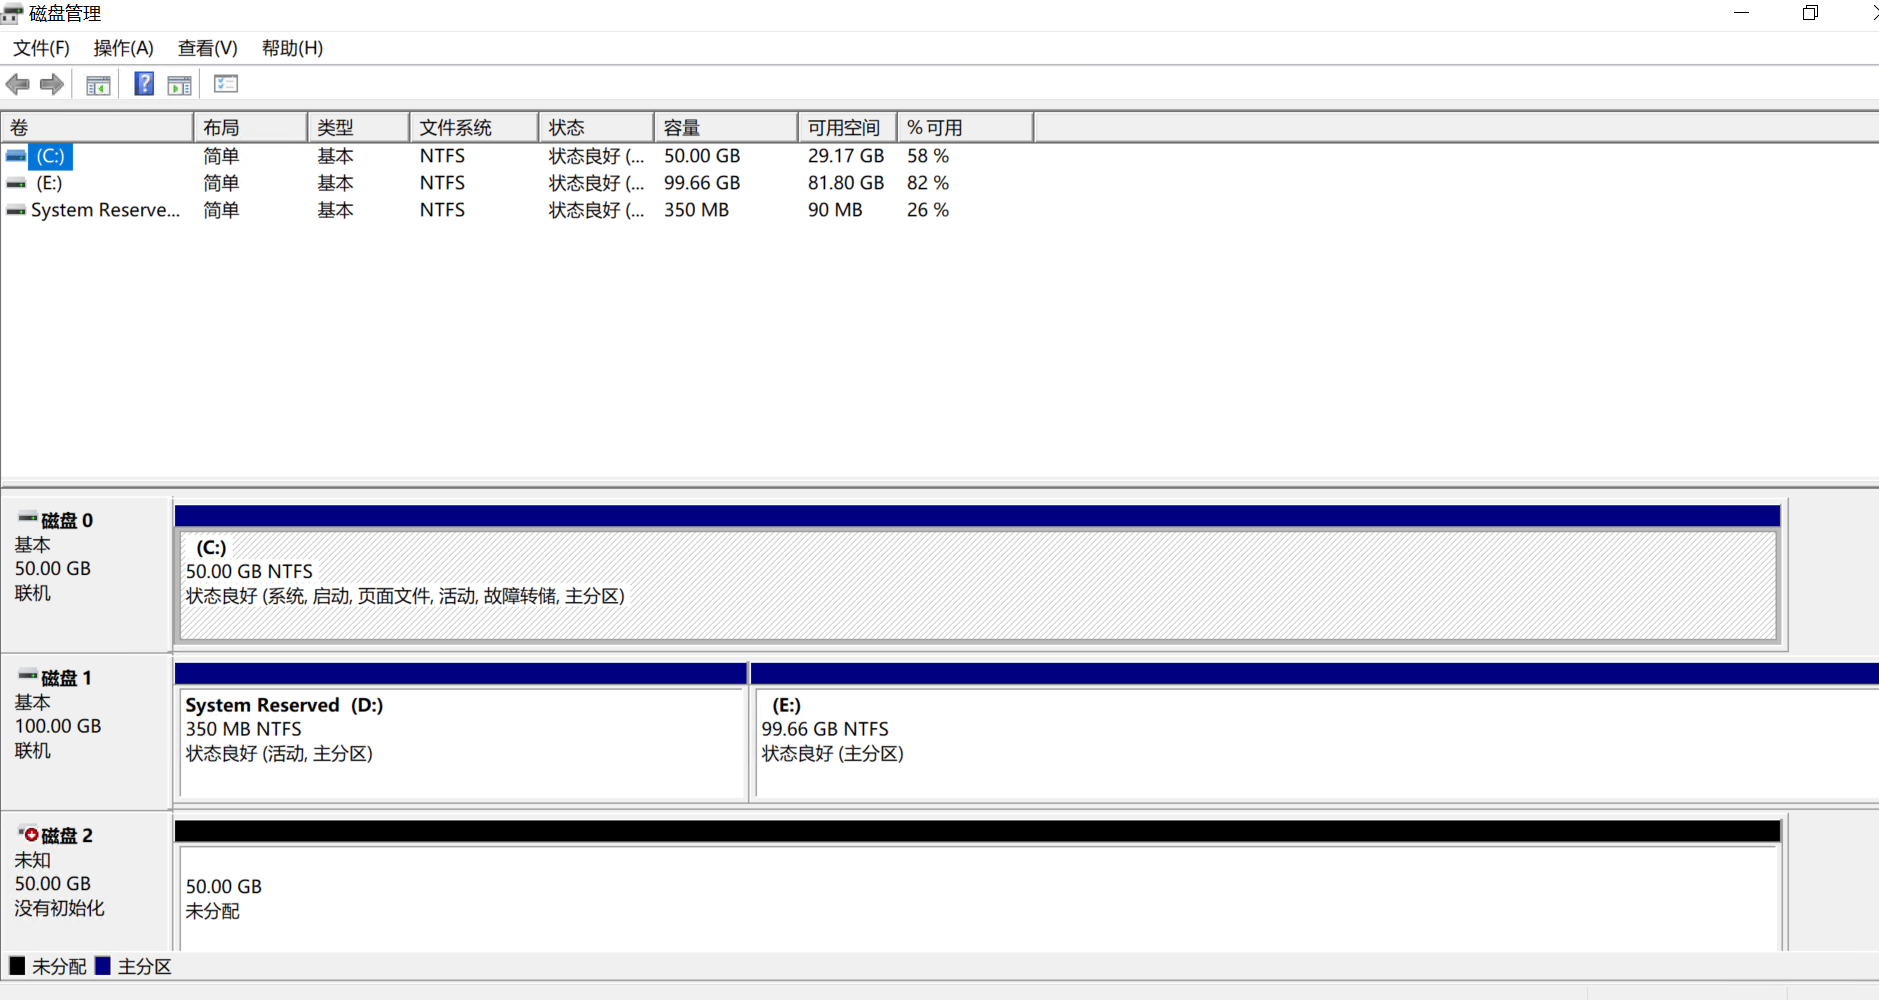
6. Clone the disk with DiskGenius
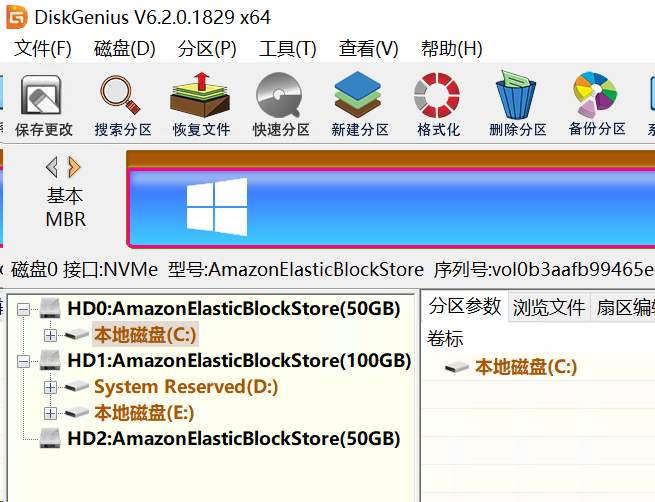
- Confirm that the helper system disk, the original root disk (including System Reserved and
C:), and the empty target disk are visible. - Choose Tools → Clone Disk.
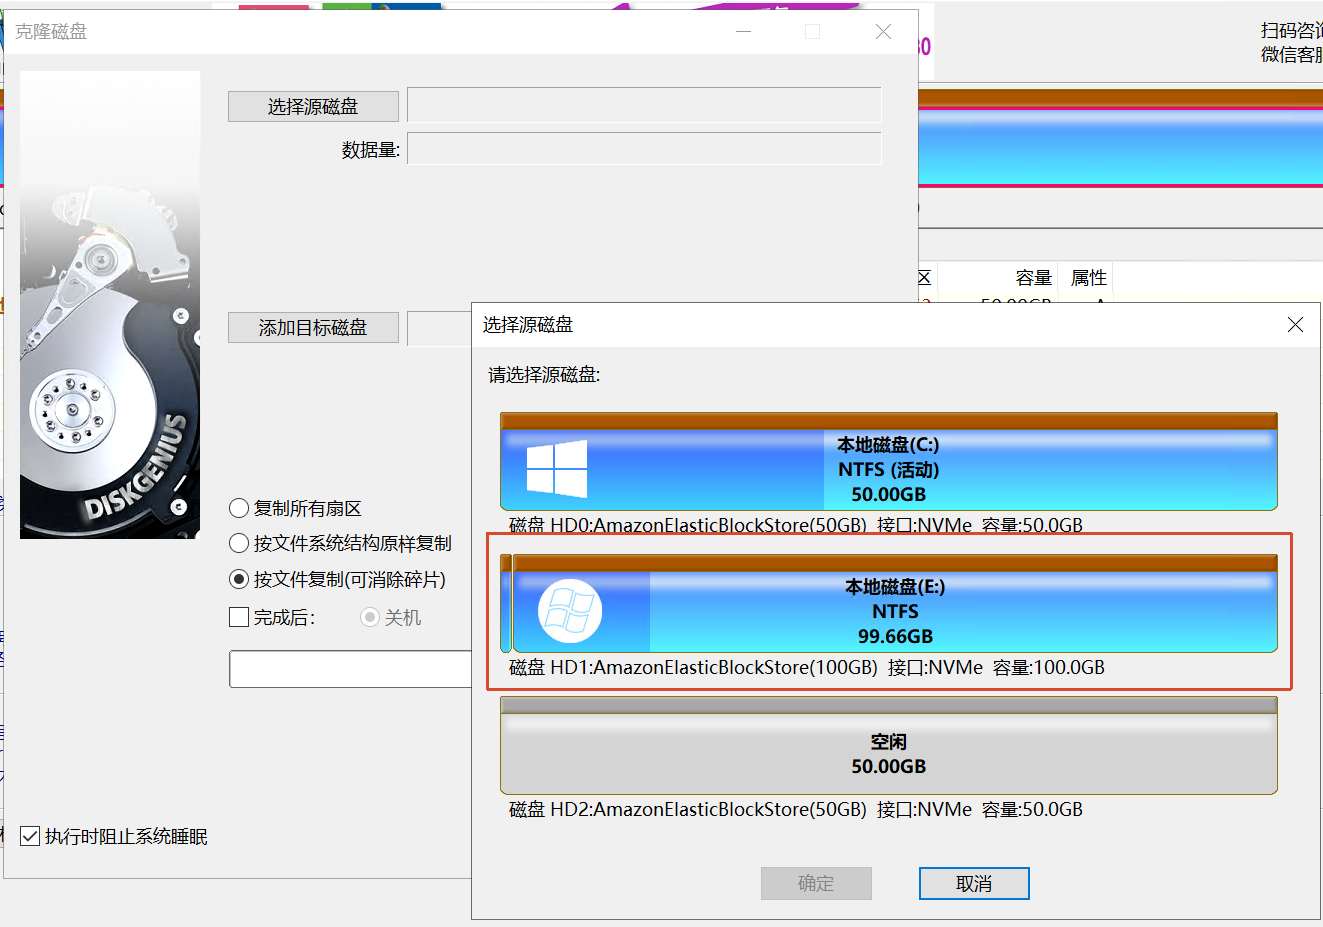
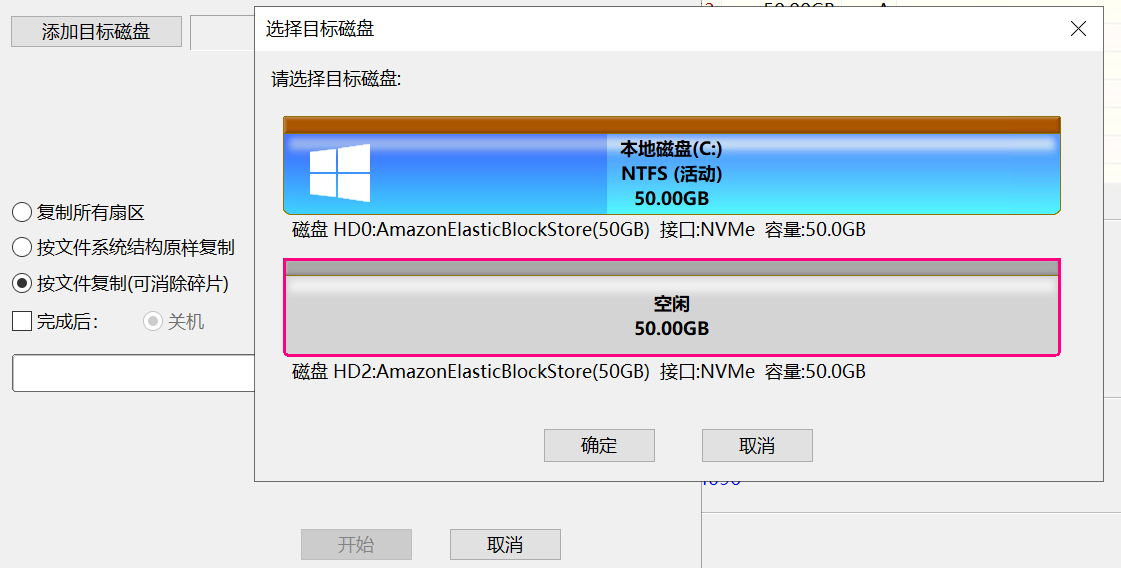
- Select the original root disk as the source and the 50 GB volume as the target.
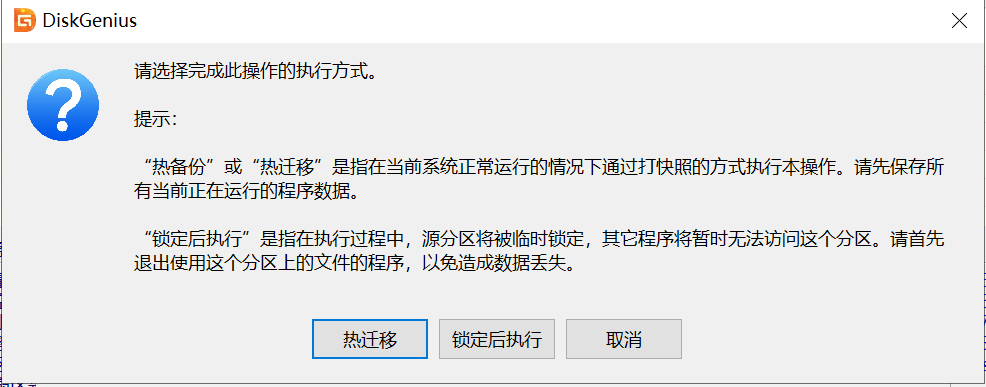
- Because the target is smaller, choose Copy files rather than sector-by-sector or filesystem-structure cloning.
- Adjust the partition boundaries if DiskGenius allocates excessive space to System Reserved. Leave enough space for the Windows partition.
- Start the task and choose Execute after locking.
7. Rebuild the boot files
After file-level cloning, the disk signature changes and the BCD partition references may be invalid. Windows can then fail with 0xc0000225 winload.exe. Bring the new volume online and assign drive letters in Disk Management.
If the disk has a System Reserved partition (for example F:) and the Windows partition is G:, run:
bcdboot G:\Windows /s F: /f BIOS /l en-usIf there is only one partition (G:), run:
bcdboot G:\Windows /s G: /f BIOS /l en-usConfirm that the command reports that the boot files were successfully created. Then mark the boot partition active. Replace the disk and partition numbers with the values shown by list disk and list partition:
diskpart
list disk
select disk 2
list partition
select partition 1
active
exit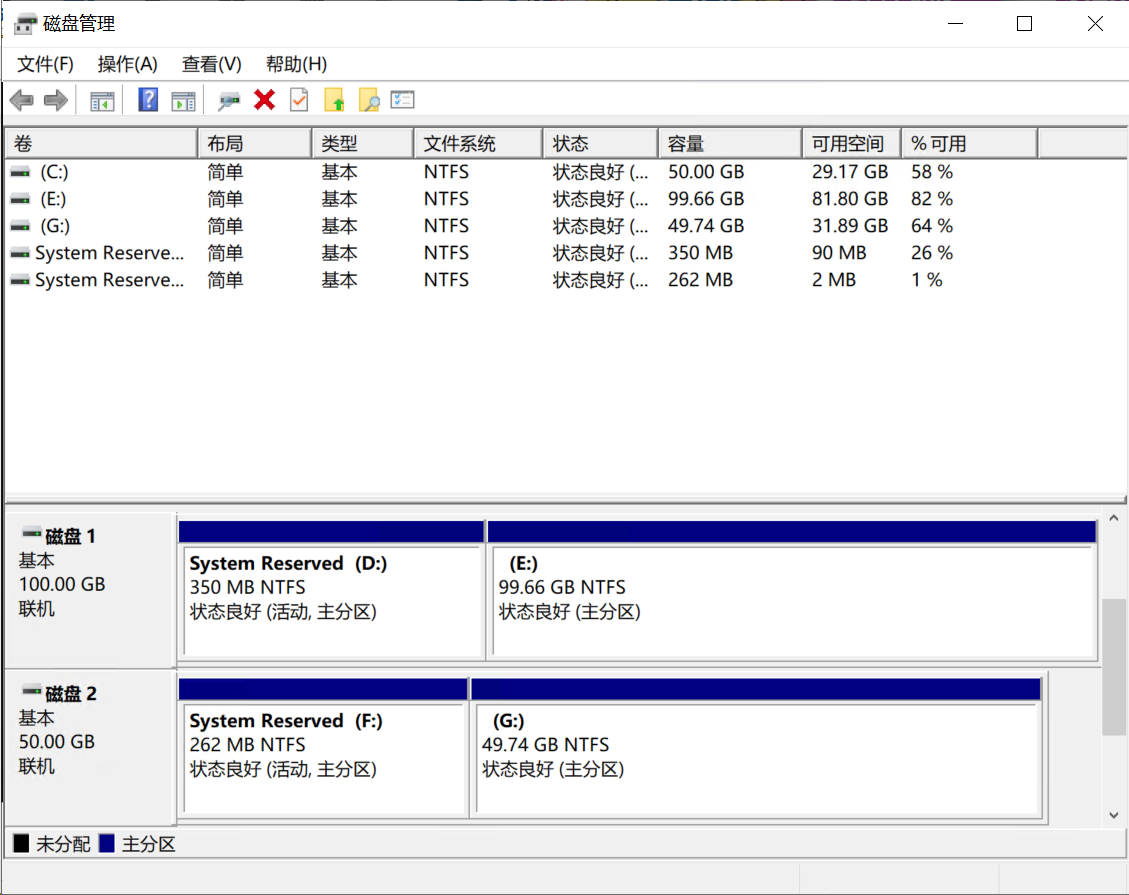
8. Attach the new volume as the original instance root
Detach both volumes from the helper instance. Attach the 50 GB clone to the original instance as /dev/sda1, the root-device position.
9. Start the original instance and verify
Start the instance. Connect over RDP and confirm that Windows boots normally and that the system disk is the expected size.
3. Final validation
Get-WmiObject Win32_LogicalDisk |
  Select DeviceID,
    @{N='SizeGB';E={[math]::Round($_.Size/1GB,1)}},
    @{N='FreeGB';E={[math]::Round($_.FreeSpace/1GB,1)}}

systeminfo | findstr /i "boot"
Are NTFS permissions preserved?
- Data volume:
/COPYALLpreserves DACL, SACL, owner, and auditing data. Compare the result withicacls. - Root volume: DiskGenius copies the NTFS file system, including permission metadata in
$MFTand$Secure.
No additional permission migration tool is required. Always verify representative administrator-only and everyone-read files before deleting the original volumes.